Sales systems
PI2 Partner Readiness
Introduction
The PI2 Product
The PI2 Workshops
Pricing and Packaging
Sales systems
The PI2 Upgrade
Conclusion, next steps, and resources
Demo accounts
How to set up a demo account
To set up a customized demo experience using your prospect’s data, find the Behavioral Assessments you’d like to include by navigating to the Seller Tools peek panel and either:
- Clicking on the correct Link / Folder Name, or
- Clicking on the “View all assessments” link.
Then, you can select one or more prospects to add to a new demo account. Note that you can search a prospect’s name (for a single BA) or domain (for multiple BAs).
All Assessments view:

Folder view:
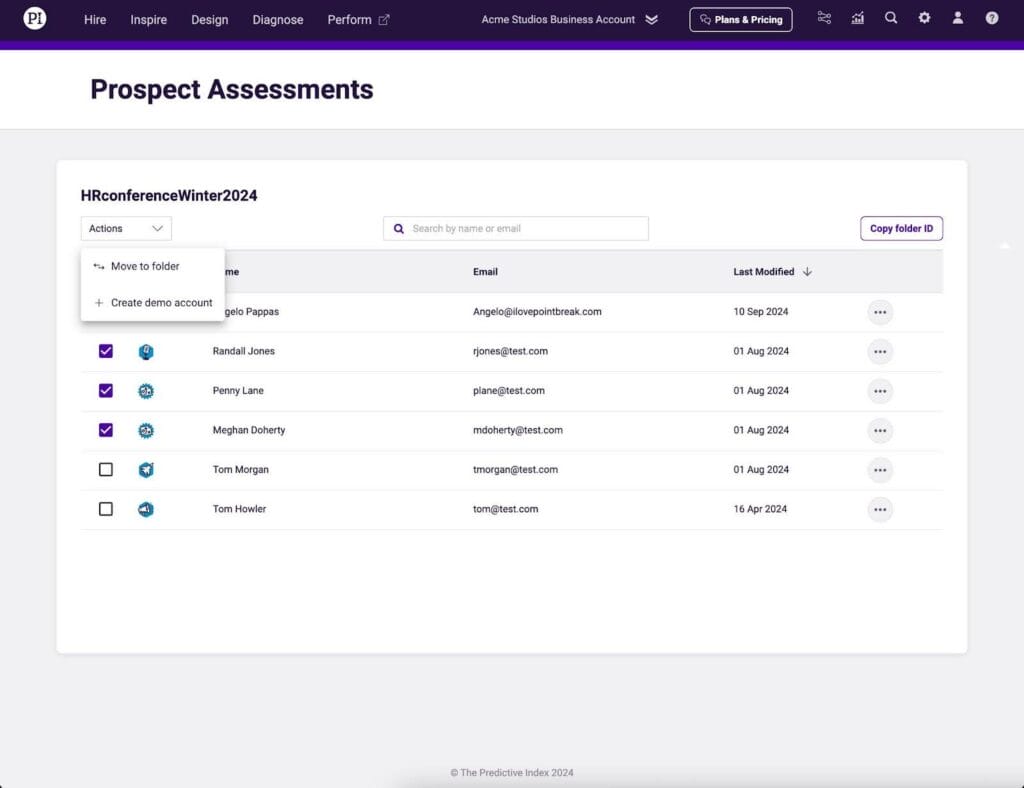
After checking off the names, select Create demo account from the Actions drop-down. The demo experience includes sample data alongside your prospect’s data that you can use while demoing and selling.
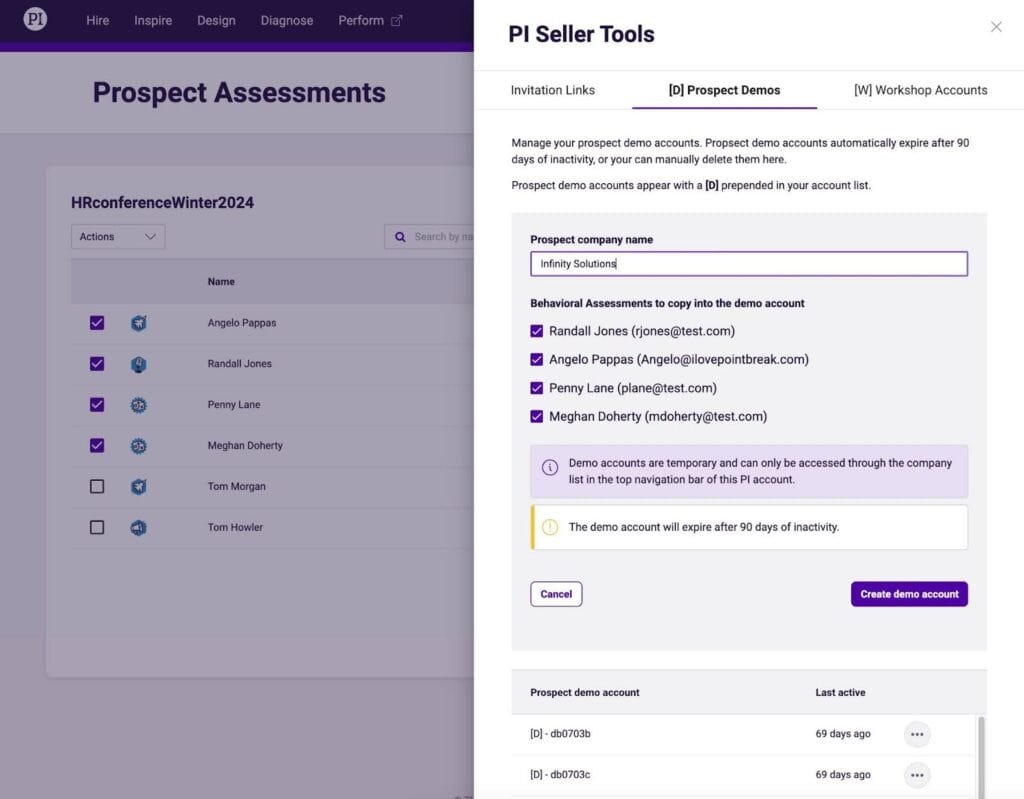
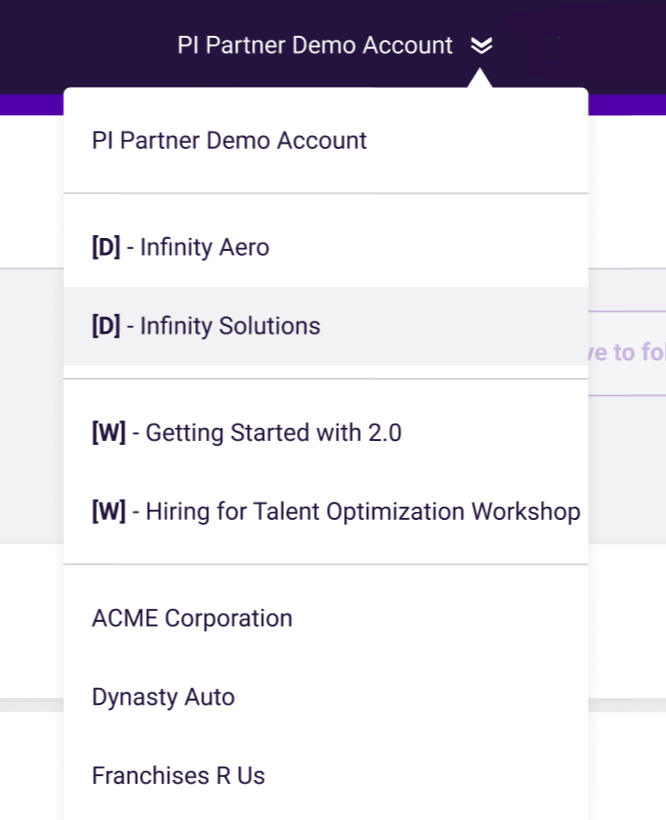
Enter the company name to complete the setup. The name will then appear in your account drop-down with a “D” prepended to the name. Example: [D] – Infinity Solutions.
To access the prospect demo account again in the future, you can find the account in your account drop-down.
Important notes about demo accounts
- Prospects do not have access to your demo accounts.
- You can now delete demo accounts from your seller account.
- Select the PI Seller Tools Icon
 .
. - Select the ellipsis icon
 for the demo account you wish to delete and select Delete Account.
 - Once a demo account is deleted, a new demo account of the same name can be recreated.
- This is applicable for all demo accounts and workshop accounts.
- Select the PI Seller Tools Icon
- Demo accounts will be automatically deleted after 90 days of inactivity (activity includes clicking on the account in the account drop down).
- If a demo account is deleted, the original behavioral data will not be deleted and will remain in the PI2 business account.
- Cognitive access is enabled in demo accounts so that partners can display sample cognitive scores while demoing to a prospect.
- Outbound emails are disabled for demo accounts. This prevents sending assessments and user invitations.
- As a third party user accessing a demo account, you will be able to perform actions in the software such as adding yourself to a team in Design, creating a Relationship Guide between you and your prospect, etc.
- If needed, click here to learn “How to Move Assessment Data” between Legacy and PI2 Accounts using Force BC.
Adding a Third-Party User to Your Demo Account
As of January 30, 2025, we have introduced the ability to add an associate to your demo and workshop accounts. You can now grant access to third-party users within your PI2 Seller Account.
Important: This feature is intended for internal sharing only. You can only share demo and workshop accounts with users who are also members of your PI2 Seller Account.
Note: The same process applies to Workshop Accounts. However, this guide specifically outlines the steps for Demo Accounts.
Steps to Add a Third-Party User to Your Demo Account
Step 1: From your PI2 Seller Account, navigate to Administration and select Third-Party Users. Locate and copy the email address of the third-party user you want to add. (Note: Only users within your PI2 Seller Account can be added.)


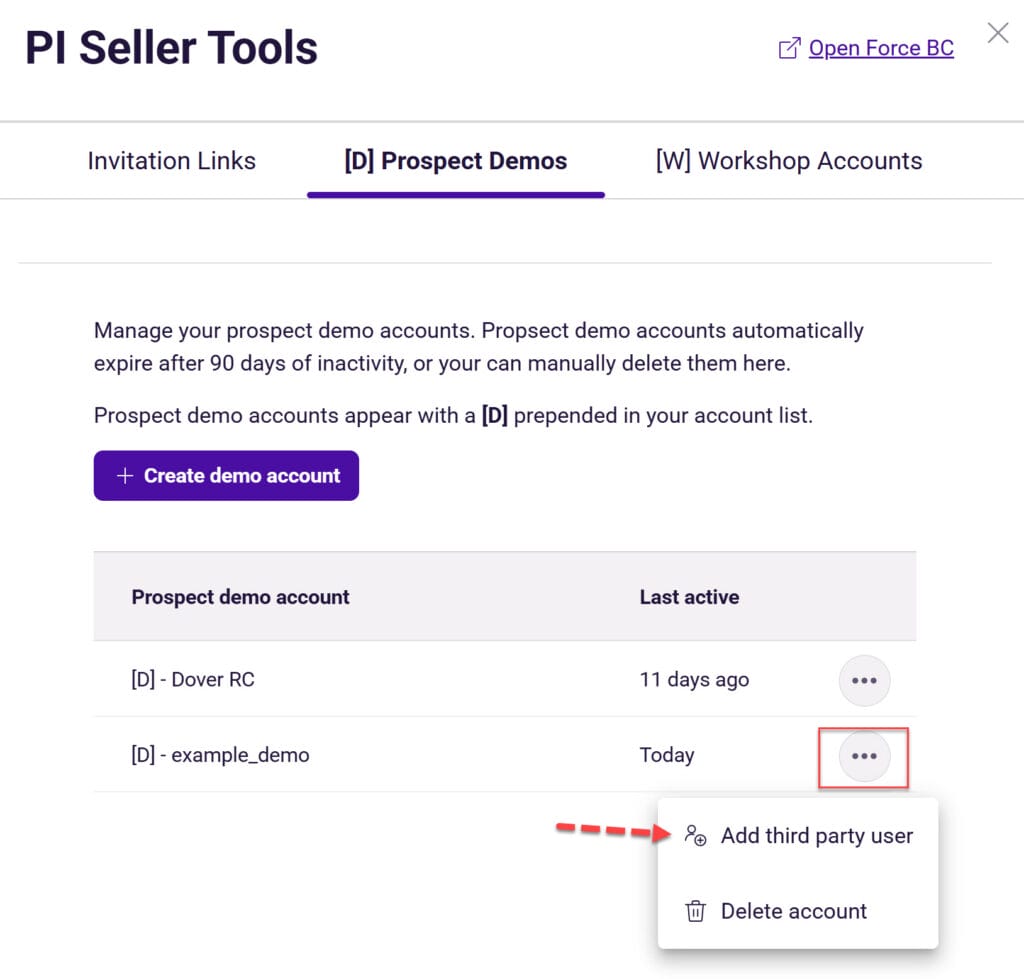
Step 2: Navigate to PI Seller Tools ![]() and select [D] Prospect Demos.
and select [D] Prospect Demos.
Step 3: Find the demo account you wish to share, then click the ellipsis icon ![]() . Select “Add 3rd Party User.”
. Select “Add 3rd Party User.”
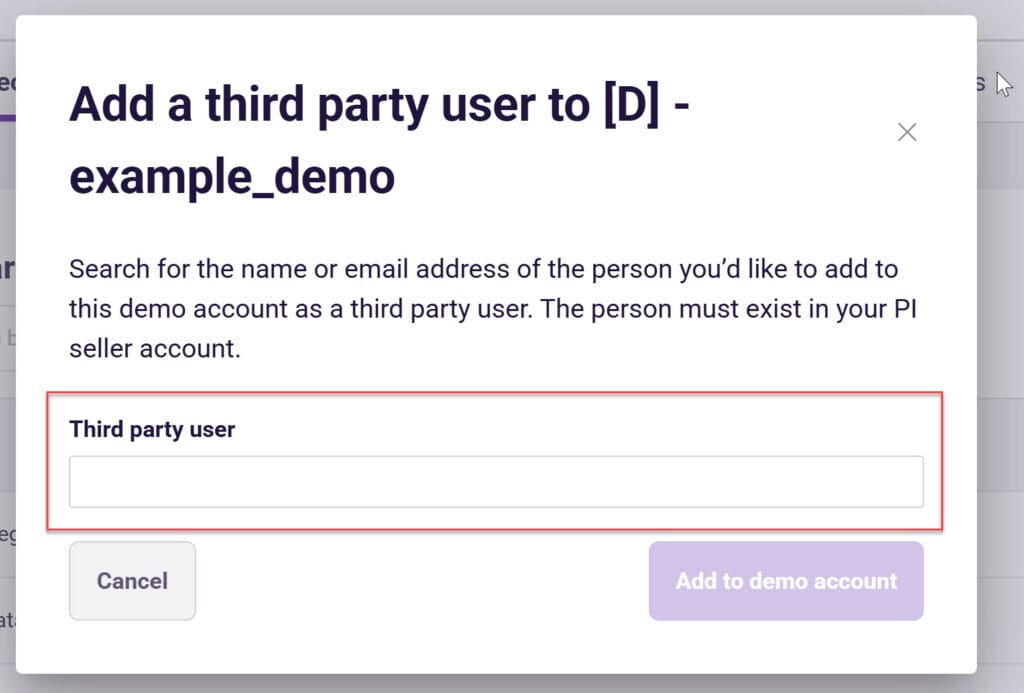
Step 4: In the text box, paste the copied email address or start typing the name of the third-party user to search for them.
Step 5: Once added, you will see the progress in the bottom right corner of the screen. The new third-party user will gain access to the demo account via their account dropdown. They will also be able to view their BA results within the demo account.