Assessment Center – Behavioral and Cognitive Assessments
Using the latest version of our software, PI2? Click here for the right support article.
There are many ways to send assessments depending on your audience. This article outlines the different ways to send an assessment through the Assessment Center. If you are trying to send an assessment to a Candidate, follow the steps below. To learn how to send assessments to your organization, click here.
Important tips!
- The recipient should take the assessment in their preferred language whenever possible.
- Introduce the assessment in a casual, non-threatening manner.
- The PI Behavioral Assessment requires the recipient’s own responses and should be influenced as little as possible by the administrator, other people, and the environment.
- When administering the assessment to a group, instruct recipients not to discuss the assessment while completing it.
Preparing the recipient for the behavioral assessment
Recipients may be unsure of how the results will be interpreted or used and may be nervous or uninterested in participation. To help set expectations, advise the recipient:
- There are no right or wrong answers – it’s not a test.
- Read instructions carefully and use your own judgment to answer questions. If you do not understand a particular word, skip it.
- The assessment should have your full concentration, so limit or remove any possible distractions.
- Time is not a factor; take as much time as you need.
Preparing the recipient for the cognitive assessment
To help set expectations, advise to the recipient:
- It is a 12 minute timed assessment that includes verbal, numerical and abstract reasoning questions.
- The assessment should have your full concentration, so limit or remove any possible distractions.
- Read instructions carefully and use your own judgment to answer questions.
- The Predictive Index Cognitive Assessment does not measure intelligence, education or experience. It simply measures a person’s capacity to learn, adapt and grasp new concepts.
For more information about the PI Cognitive Assessment, visit Cognitive Assessment Scoring
To send an assessment, navigate to the Assessment Center by clicking ‘Send Assessments‘ in the top right corner of the software.
Send assessments by email
1. Confirm you are on the ‘Invite By Email’ tab.
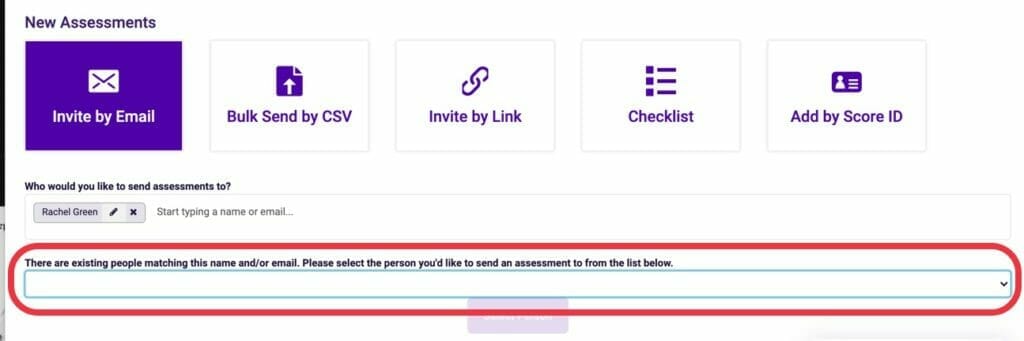
2. Under the field ‘Who would you like to send assessments to?’, type the email address of the person or people you’d like to invite to take the assessment.
TIP: If you’ve already sent an invitation to that person, their name and information will populate. If you haven’t, you’ll be asked to create a new user.
3. If you’re sending the assessment to a new person, you’ll be asked:
- If they’re a Candidate, Employee, or Other
- Their First, Middle (Optional) and Last name
- What folder you’d like their assessment results to be saved in.
- If you’d like to link the person to a job you’ve created. Doing so unlocks the power of many of the tools and guides in the software.
Click Create New Person.
4. If one of the names or email matches a person that already exists in your account you will be asked to select either the existing name in the drop down or to create a new person with this information.
5. Once all assessment takers names have been added, click Next.
6. You will then have the option to select which assessments you want to send. You can send behavioral only, cognitive only or both the behavioral and cognitive assessments.
Tip: If you would like the cognitive assessment to be sent out after the behavioral assessment has been completed, be sure to check off this box. This is outlined in the image below.
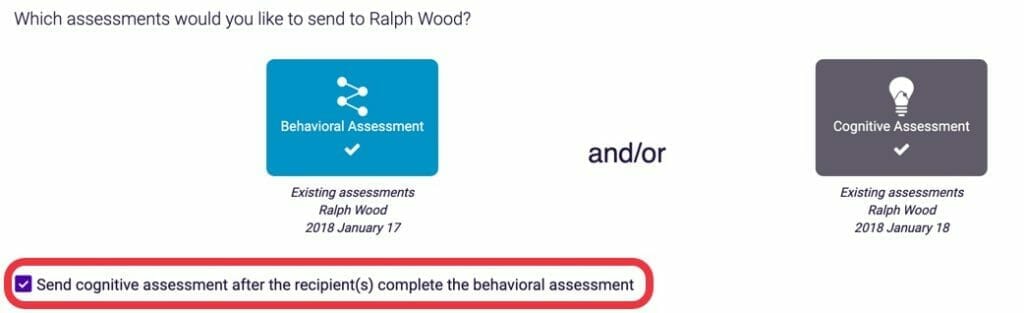
Then click Next.
7. You’ll see and can edit…
- The default assessment language.
- The subject line and message of the email, which you can customize.
- An option to auto-send the results of the report to the assessment taker (behavioral only)
- You can also edit the sender details (add/remove/edit settings) for the individual(s) you’re sending the assessment to and you can preview the email.
Note: You can edit these fields for both Behavioral and cognitive assessments if sending both out.
8. Click Send Now. You will receive a green success notification in the bottom right corner and your screen will take you back to step one of the Assessment Center.
TIP: Send an assessment to yourself first via email so you can see how it works and what is communicated in the email!
Send assessments by open invitation link
Create a new open invitation link
1. From the Assessment Center, click the ‘Invite by Link’ tab.
2. Click ‘Create New Invitation Link’.
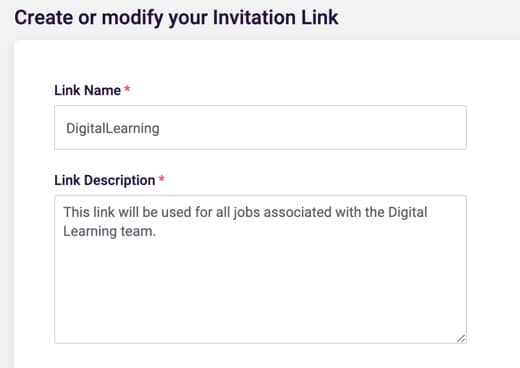
3. Add a link name and link description. We recommend labeling the link by job title, department, etc. and then that name will carry over to the URL so you can easily spot them. The link description helps you manage your links and understand what the link was created for.
*Please note there can be no spaces between words in the Link Name
4. Associate your link with the assessment takers Type – (Candidate, Employee, Other)
5. Select the Default Assessment Response Folder. This is where the assessment will live once it has been completed. You can search for a folder by clicking on the folder icon or typing in the search bar.
6. Associating the assessment taker with a job is optional, but highly recommended for Candidates. You can search for the position by typing the job title into the search bar.
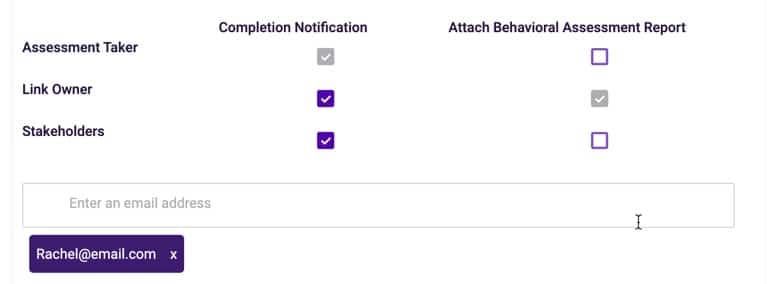
7. Under notification settings, designate a Link Owner. This person’s name and email will be listed as the contact person in communications with the Assessment Taker. Each link will have a link owner. This does not need to be the person that created the link, but should be the person who is administering the assessment from the link. You can also easily set yourself as the link owner by clicking ‘Set Self as Link Owner’
8. Under the Link Owner, you can choose to attach the Assessment Taker’s Behavioral Assessment to their completion email. You can also designate additional people to be notified when the assessment is completed. This includes the Link Owner and additional stakeholders. Stakeholder names should be added in the box below.
9. Under ‘Additional Configurations’, the default assessment language will determine the language selected on the first page of the Assessment site. The survey taker can still choose a different language to complete the behavioral assessment in.
10. Autosend Cognitive Assessment – When turned on, the survey taker will receive an email invitation to complete the Cognitive Assessment after completion of the Behavioral Assessment.
11. Kiosk Mode: Allows multiple people to take the Behavioral Assessment consecutively. Typically used for a conference kiosk or job fair.
12. Redirect URL: Users will be able to redirect a survey taker to a particular website upon completion of the behavioral assessment. Example: User may choose to send the survey taker back to their careers site.
13. Click ‘save’ at the bottom when finished.
Manage open invitation links
Note: Only Account Owners and Account Admins will have access to edit open invitation links after creation.
1. For the ‘Invite by Link tab, you can view all of your existing active links. You can see who created the link, and who the last person was to modify them. You can also see the job the link is associated with.
2. To edit an existing link, click on the link name. This will bring you to the same page used to originally create the link.
3. To delete an existing link, select the check box next to the link you’d like to delete, and then click on ‘Actions’ and select ‘Delete’.
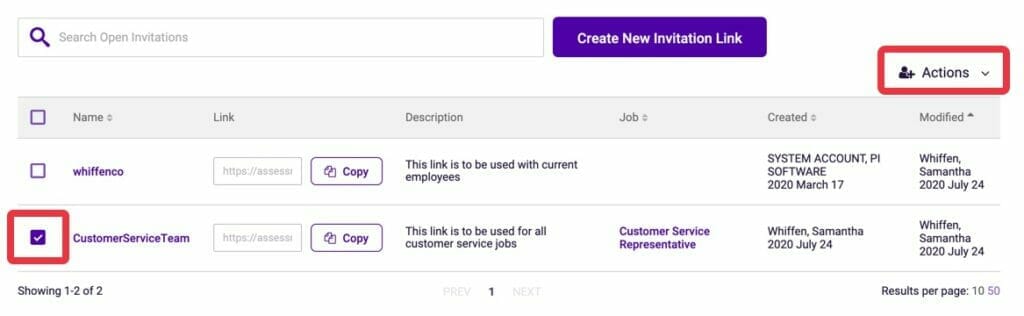
4. To quickly copy the Open Invitation link URL, click ‘Copy’ next to the link field. This will automatically copy the link to your clipboard.
5. If you have a lot of Open Invitation links, you can quickly locate the one you need by searching for it by name or by URL in the search bar. This will bring up all links with that name.
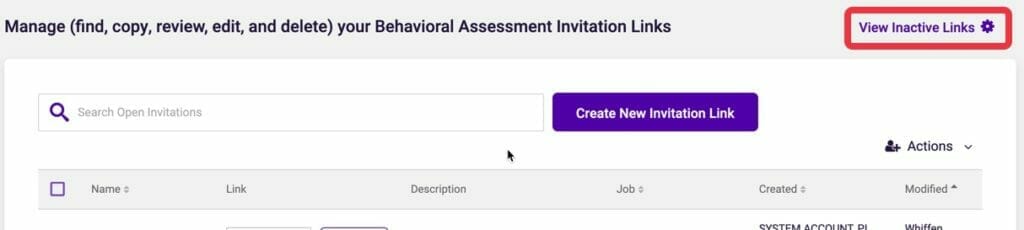
6. Click the ‘View Inactive Links’ button to view your inactive links, or links that have not been used in some time. In this section, you can delete any inactive links that are no longer needed. If a link in the Inactive Link section is used by a candidate, the link will become active again, and will move to your link management page.
Bulk send assessments
NOTE: Bulk Send currently supports up to 1,000 invitations per upload.
1. Click on the ‘Bulk Send by CSV’ tab in the assessment center.
2. Select the Type that will be assigned to each assessment taker on your list: Candidate, Employee, or Other.
3. If you would like the assessment takers to be associated with a job, search for the job by typing in the search bar under ‘Which job?’.
4. Select what assessment you would like to send. You can choose the behavioral assessment, cognitive assessment or both.
5. Set email and default assessment language if not already selected.
6. Select the folder which you want to save the assessment results in. You can search for a folder by clicking on the folder icon or typing in the search bar.
7. Select if you would like to receive assessment completion notification emails.
8. Download our template labeled ‘BulkAssessmentUploadTemplate.csv’.
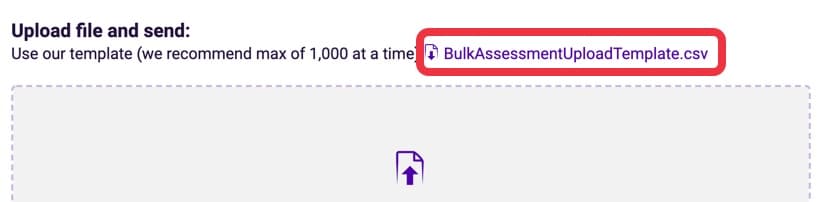
8. In the downloaded template, enter in the list of candidates or employees to the Excel template, following the format listed. Do not remove any columns or edit the column names. Your list should not exceed 1,000 names.
9. Upload the Excel document back into the software by either dragging and dropping into the grey box or by selecting the file from your computer. Click Send Assessments.
You should receive a completion notification once the emails are sent. Please note that if there are issues with any of the emails going out you will receive an email notification.
Behavioral Assessment paper version
1. Navigate to the ‘Checklist’ tab in the assessment center.
2. Click on the ‘Download’ button to download the paper version of the assessment. You can print the assessment out from your computer to administer.
3. Once you have the assessment taker’s results, come back to the Checklist tab in the Assessment Center.
4. Click ‘Enter Responses’.
5. You will be brought to a new screen and will be asked:
- If they’re a Candidate, Employee, or Other
- Their First, Middle (Optional) and Last name
- Email Address (Optional but recommended if available)
- Date of assessment
NOTE: Your entries will be found in your company’s main root folder.
Click Continue
6. Check off the words from page one of the paper assessment to match what the assessment taker checked on paper. Click Continue.
6. Check off the words from page two of the paper assessment and then click Submit.
7. You then have the option to continue adding in additional paper assessments or view the already scored assessments.
Add behavioral assessment by score ID
1. Click on the ‘Add by Score ID’ tab in the Assessment Center.
2. Under the field ‘Who would you like to send assessments to?’, type the email address of the person you are adding the score ID for.
TIP: If you’ve already sent an invitation to that person, their name and information will populate. If you haven’t, you’ll be asked to create a new user.
3. If you’re adding a new person, you’ll be asked:
- If they’re a Candidate, Employee, or Other
- Their First, Middle (Optional) and Last name
- What folder you’d like their assessment results to be saved in.
- If you’d like to link the person to a job you’ve created. Doing so unlocks the power of many of the tools and guides in the software.
Click Create New Person.
4. If the name or email matches a person that already exists in your account you will be asked to select either the existing name in the drop down or to create a new person with this information.
5. Click Next.
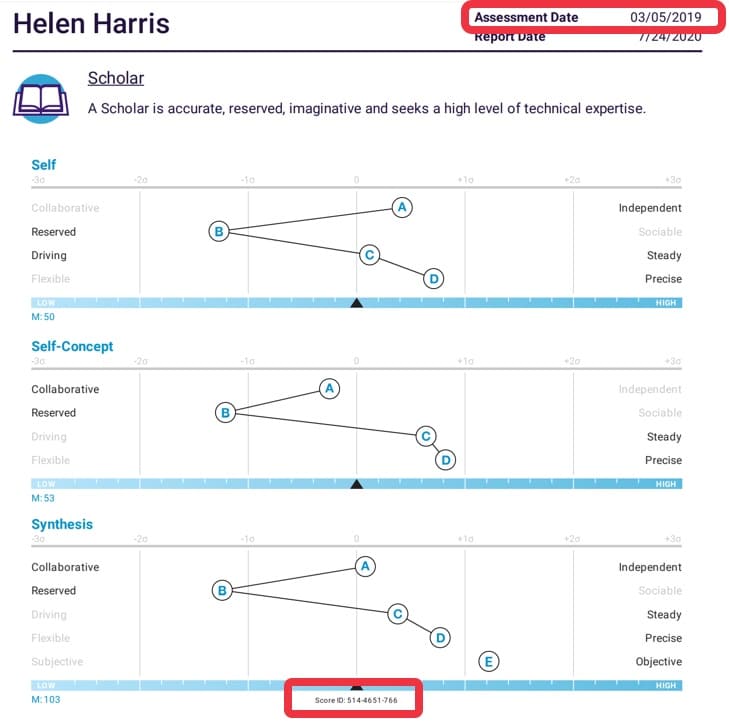
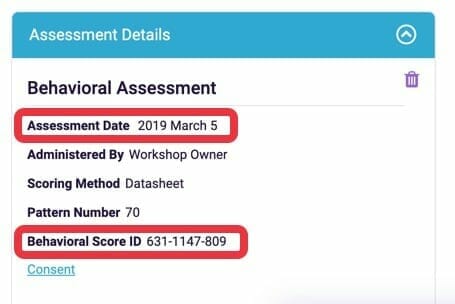
6. Enter the person’s 10 digit code for the Behavioral Score ID, as well as the Assessment Date. These can be found on the person’s previous Behavioral Report or in the Assessment Details section on a person’s page in the software.
7. Click Create.
Send multiple reports at once
You may send multiple assessment reports from anywhere assessments are kept: the recently completed section of the dashboard, groups, or folders. Navigate to the area containing the multiple assessments that you would like to send.
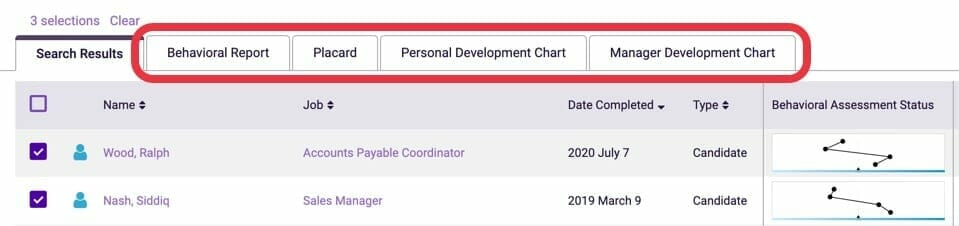
1. From the list of completed assessments, select those who’s reports you’d like to send at the same time by checking the box next to their name.
2. Click on the tab containing the type of report or chart you would like to send – Behavioral Report, Placard, Personal Development Chart, Manager Development Chart.
3. In Step 1 you can view the people selected. For behavioral reports you also have the option to choose the language you would like to send the reports in, select Optional Report Additions, and associate people to jobs. Once complete, click ‘Next’.
4. In Step 2, you can preview the multiple reports, and choose to email, print, and/or download the reports. You may also select ‘Report Settings’ to be taken back to Step 1.
Clicking ‘Download’ will download all of the reports in a single PDF file onto your computer. The software does not support downloading multiple individual PDF reports at this time.
Click Email to be taken to the next step.
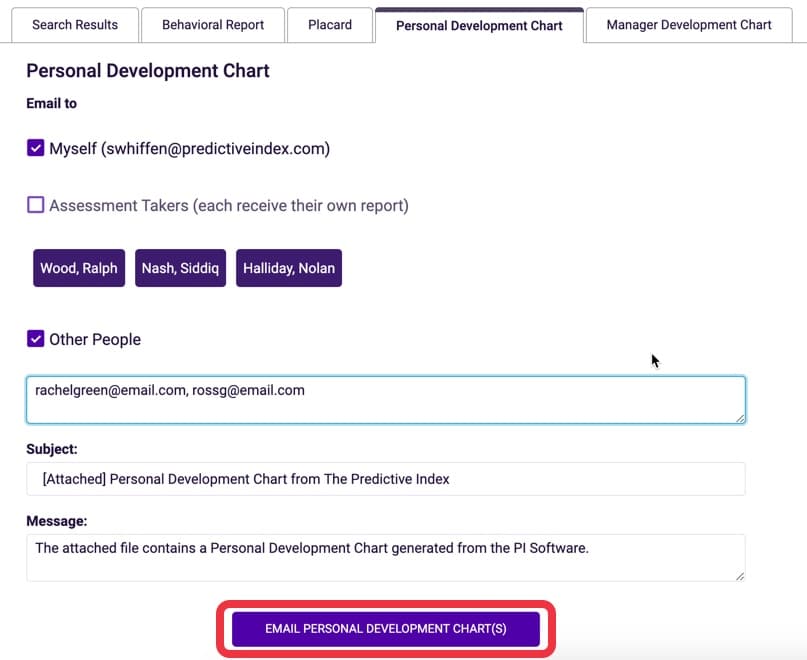
5. In Step 3, you may select to email the reports to yourself, the assessment takers, and other people. To do this, check the boxes next to each option.
When sending reports to other people, each email address entered must be separated by a single comma.
Finally, you may choose to edit the subject line of the email, and the message in the body. If all looks correct, click the purple email button at the bottom.
Related Videos
Sending a behavioral assessment
Creating an open invitation link
Locating, editing and deleting open invitation links
Adding behavioral assessment by score ID
To inform us of a typo or other error, click here. To request a new feature, click here.