
Importing your data is one of two survey distribution methods available in PI Diagnose.
This method lets you track and monitor long-term engagement trends across your entire employee base.
Why should I use this method?
Importing your organizational data allows you to analyze engagement trends on both a macro (organization-wide) and a micro (team-wide) level.
When sending out a survey that has imported data, each manager at your organization with at least five direct reports will receive their own personalized team report.
Note: This is the only distribution method that offers personalized team reports.
What’s the downside to this method?
Importing your data tends to be the most time-intensive distribution method. While we provide a template you may use, there’s still a baseline of prep work and organizational coordination required on your end.
For this reason, you may decide it’s more convenient to use a faster distribution method, like a quick link.
How to import organizational data
- Select Diagnose from the top navigation bar.
- From the Survey Center, select the survey you wish to send.
- Select the Distribute tab.
- Select Import your data.
- Read the requirements, then click Upload an organization file.
- Follow the guided instructions within the software to ensure your file is error-free. (Having trouble? Click here.)
- Once satisfied with your data, select Use this data.
How to schedule your survey
Once you’ve imported your data, you’ll want to schedule your survey and send it out to your employees.
To schedule your survey:
- Within the Distribute tab, select the start and end dates for your survey.
- Set a reminder email date.
- Review the provided email template.
- Click Schedule survey.
FAQ
Below is a detailed step-by-step you can follow to troubleshoot any issues:
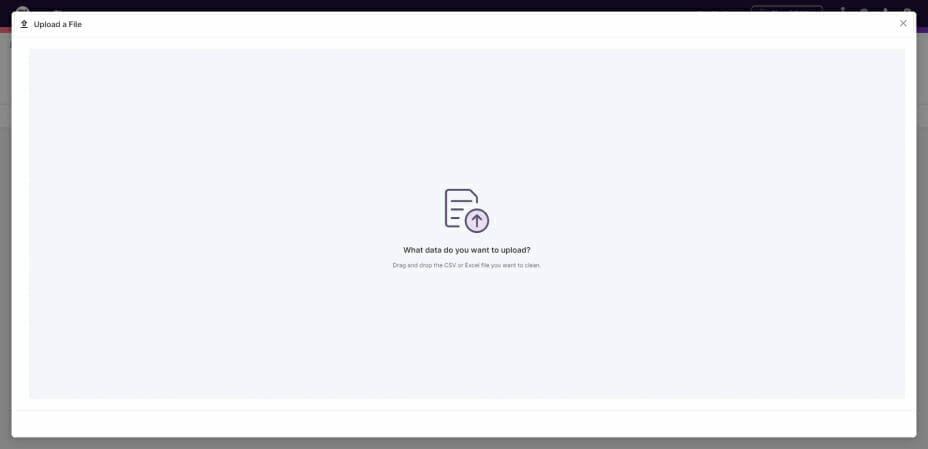
1. Upload a file: Upload an Excel or CSV file containing the required data. (Note: Diagnose provides a template file you can download to make this process easier.)
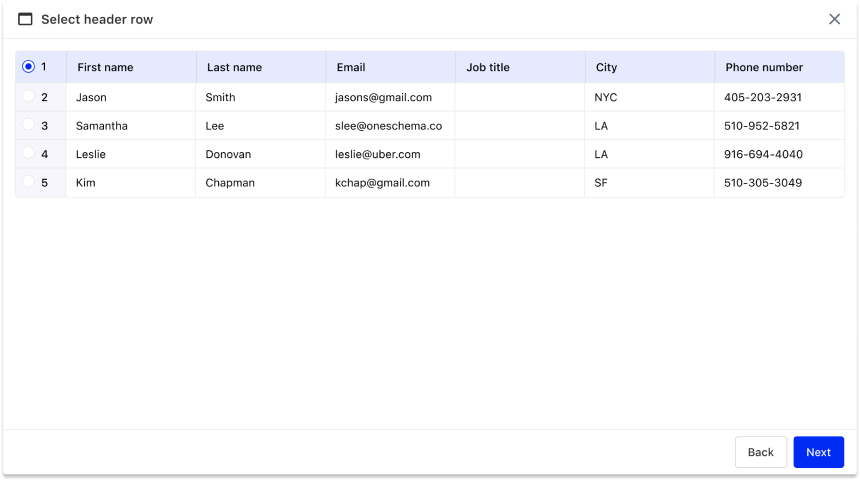
2. Select header row: Specify which row in the spreadsheet is your header row. (In most cases, the first row is the header row.) If OneSchema automatically detects your header row, it’ll skip this step. Once finished, click Next.
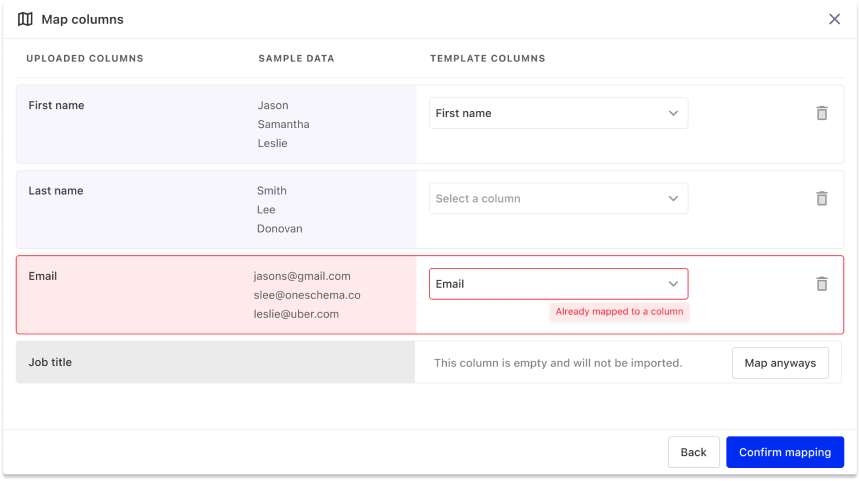
3. Map columns: Specify the columns uploaded via spreadsheet that correspond to the “template columns” required by Diagnose. If OneSchema detects an exact match, it will automatically map those columns for you. Once finished, click Confirm mapping.
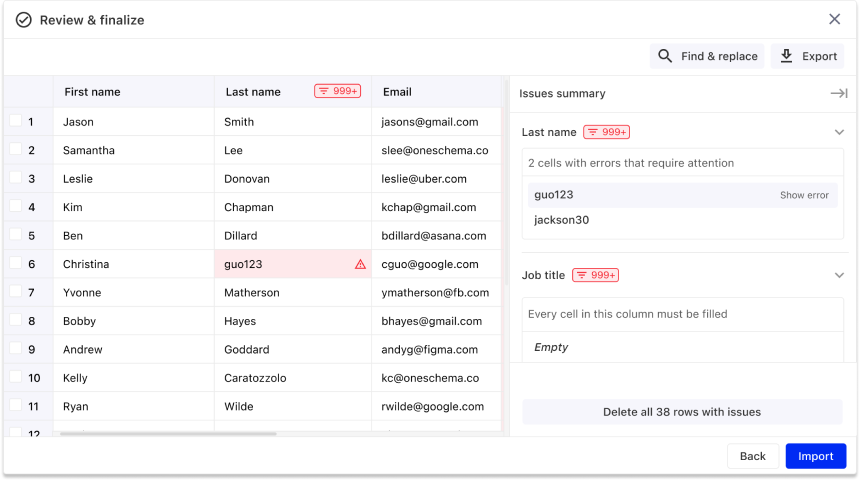
4. Review & finalize: You’ll be presented with a spreadsheet-like view of your organization data. Use this screen to fix any validation errors within your file, either manually or automatically. Once satisfied with the changes, click Import.
5. Your organization file will be uploaded and ready to use.
Click the hyperlink titled “download our template.”
For more on PI’s data security protocols, visit our Trust Center.
Learn more about user anonymity and data confidentiality.
Additional support
Do you still need support? Contact us here.
Was this page helpful? Spot a typo or inaccuracy? Let us know.